Reshader
Hello everyone!
Some of you can tell that I use a reshader in my previews since I really love vibrant colors. Here is a small tutorial about how to install and use reshaders.
1. First of all you're going to need to download the Reshader and a preset. I'll list some presets here so you can choose. In this tutorial I'll be using the Simemi preset.
The preset I use is by Simemi.
Here is another preset by Harrie.


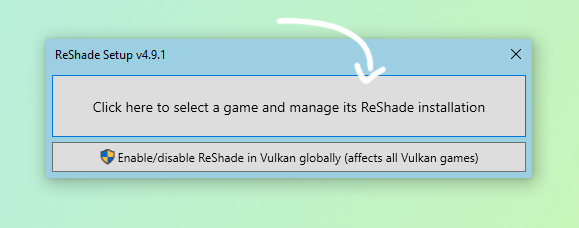
2. Open the installer (Right click on the installer and Run it as administrator)

3. Click on “Select game” and find your game.
Usually: C:\Program Files (x86)\Origin Games\The Sims 4\Game\Bin
and choose the .exe file (depending on which version of the game you use. You can find the legacy .exe file in the Bin_LE folder.)
4. Select “Direct3D 9” and a screen will pop-up asking which effect packages to install. Just press "OK" and it should be fine. It might pop-up again, in that case press "OK" again.


5. You have installed the Reshader successfully. Since the installation is done you can close this window.

6. Now we're going to download the preset by Simemi I mentioned in the beginning of this tutorial. Download it here.


7. Place the preset you just downloaded in the Bin folder where your game is located.

8. Open The Sims 4. When the game starts you'll see this at the top of your screen. Your Sims might freeze. Don't worry this will not last long.
9. To open the Reshader menu press "HOME". To use the downloaded preset go to Home and choose the preset you downloaded. In this case we're looking for "Simemi's Preset V2". You can close the menu bij hitting "HOME".

10. To make screenshots in game you need to use the "PRT SC" button instead of "C". You can find your screenshots in the Bin folder.


